HOW AP IS GENERATED
Historically, AP has come primarily from killing opponents. Each individual is worth a certain amount of AP. That amount usually ranges from 1,500 to 1,800 though it can vary from almost nothing up to 2250 based on a few factors:
- The level of the person who died (lower level = less AP)
- How long since the person died (shorter = less AP with full AP value returning after 5 minutes of no deaths)
- The alliance rank of the person being killed (0.5% per alliance rank, thus 25% more AP for killing an AR50 Grand Overlord than an AR1 Volunteer)
- The campaign buffs that you have (small % for home keeps, and more for each enemy keep owned)
- The personal buff that you have (20% for killing a delve boss)
- See this spreadsheet for more details.
TICKS
As of the Summerset patch (v4.0.5), defence ticks at keeps and resources work slightly differently. To get on the credit list for a defence tick, you must do one of the following:
- Do damage to an opposing player who dies (resulting in AP)
- Repair a wall or door
- Resurrect a dead player who is within the keep area
- Heal a player who has taken damage in a fight, where that player kills an opponent and earns AP
Defence ticks have also received a multiplier based on the level of the keep or resource. You can see the keep or resource level by opening the map and clicking on it.
When players (both sides) die in range of a keep, resource, outpost, or behind a scroll gate, the total amount of AP that they gave up with their deaths gets added to the “tick pool”. If a keep/resource/outpost is taken there is an offence tick (O-Tick). If there has been no death within a certain amount of time (one minute) then there is a defence tick (D-Tick). When a tick happens, the total tick pool gets multiplied based on the keep or resource level (if it’s a keep or resource), and is then divided up between all of the players within range (who are members of the alliance that owns the keep/resource/outpost) and who have done something to get on the credit list.
Most ticks range from a few hundred to a few thousand, though prolonged fights can generate ticks in the tens of thousands. The largest tick I’ve ever seen was for 596k during the 2018 Mid Year Mayhem (double AP) event. Prior to that, it was for 118k AP at Bleakers. Long long ago before base AP was doubled and before there were 20% delve buffs or 100% AP buffs, there was a 70k tick called “The Tickening”. It took place at Sej in late 2014 after a fight that lasted well over 8 hours. Opponents would send people in to die every minute while they regrouped just to ensure that there would be no D-tick.
Capturing a resource nets you 1,500 AP, and capturing a keep is 6,000 AP. If players have been killed during the capture, then that amount is added to the tick as described earlier. A simple manner to make consistent AP is to group up and take resources continuously. Every hour, the players renew their 20% AP buff in a delve, then proceed to take all three resources of a keep, run to the next keep to take all three resources, and continue on. They sometimes stop to kill players if it’s convenient, though the amount of AP is usually better if they just keep going to the next resource. This can net up to 60k AP per hour if there are no kills made – a reasonable amount for low levels of effort. While competent groups can easily make more than that, during lower population times some groups just keep taking resources.
SOLO VS GROUP
When you’re solo, if you’re the only person to damage an opponent (and nobody has healed you while you took damage from said opponent), you get all the AP. If you are part of a group, then for every member of the group (even if they didn’t participate in the killing or healing), as long as they are in range, the AP will be split with the members of the group See the AP Calculations sheet (second page) within this spreadsheet for more details. There is a balance to be found for making AP, and I’ve always preferred groups of 6 to 8 – as beyond that the AP is too diluted. Larger groups can be fun, and sometimes when fighting other large groups or faction stacks it is necessary, but if AP is your primary focus you should probably cap your group at 8.
In order to get AP from a kill you (or your group) has to do damage to the person who died. Simply tagging them (such as with caltrops) isn’t usually enough, as the amount of AP you get scales with the percentage of damage that you do to the target. In most engagements, people will be healed while they fight, so a person with 20k health may in fact need 50k damage to be killed (as the person has received 30k healing over the course of the fight). Damage to shields is also included in this, so if you want a significant portion of the AP gains you have to do enough damage.
Healing other players used to give a lot of AP, though that has been significantly reduced. Simply casting heals on people won’t net you very much AP (comparatively). There are still methods to gain AP from other peoples’ work related to buffs, debuffs, and synergies. Every patch is slightly different, so you should test using each skill available to you and see if that nets you increased AP from opponent deaths.
OTHER SOURCES OF AP
People who take fall damage can be healed for a little bit of AP even while not in combat and that AP is not usually shared with the group. The amount of AP earned is minimal (well under 100 per player healed) and there is a cool down whereby healing that player won’t generate AP for a certain amount of time, so I have not done any testing to confirm these numbers (believing it to not be worth the time).
You can also make AP by turning in quests that are given at your starting gate, though other than the kill enemies quests they tend to be more opportunistic – rather than something you should strive to do. Sometimes you have to make a decision of timing for turning in quests. If you leave a location, then you’re not earning AP at the location while in transit. The quest turn-in can wait until a fight is over and you’re ready to go somewhere else.
Repairing walls and doors also makes you AP, though the amount that you spend on repair kits will be more than what you get by using them. If you intend to make AP by repairing, try to get the delve AP buff and if possible the (major/minor) mending buffs as they apply extra “healing” to repairs as well, saving you on the cost of repair kits. The extra AP from repairing a wall while you have a buff is proportional to the extra repair amount that you do.
DELVES
You can increase your AP gains by 20% for one hour by killing a boss in a delve. Note that it may take a few minutes to get to a delve, clear the trash (or just run past it), and kill the boss – then get back to your group or fight location. You should never leave a good fight or a potential tick to get the buff, as the amount of AP you’ll lose out on may very well be more than 20% of what you’ll make in the next hour. Note that entering a delve removes you from the credit list for a tick! Always save your AP buff renewals for times when your group is on break, or you know there will be a lull in fighting for a few minutes. If you want to save a minute or two – and if you’re hard core AP farming then every minute counts, you can allow the delve NPCs to kill you then respawn at the wayshrine. This is usually a faster way to get out of a delve if you intend to go somewhere where transit is up.
PLAY STYLE
Now that you understand how AP works, it is very important to understand that there are very different play styles. Playing for AP farming is very different from playing for map control, winning fights, taking keeps/resources/outposts/villages, or any other play style. When you play for AP, the most important thing is how much AP you will make. If you can make 10k more AP per hour by repeatedly bombing, dying, and running back than you can by waiting and ganking or cycling resources at different keeps (but never dying), then you choose the first method. Every player has to figure this out for themselves – what is the best method for making AP based on their skills, build, and preferred style of play – or what is within their capabilities.
When looking at the map and deciding where you want to make AP, you need to consider the following:
-
- Where your opponents will be.
- Where will they be coming from (running back after being killed).
- How long it will take them to be worth good AP again.
- Who else will be there (other factions and your own faction).
- The likelihood of how long you’ll live.
- How many kills you’ll get.
- What percentage of AP you’ll get for those kills if shared with other people.
- What the terrain will be like.
- Will you be able to get offence or defence ticks rather than just kills.
When you see popular streamers going for emperor, they don’t often understand AP farming and just try to play their 1 v X (I call it 1 v Potato as they don’t fight skilled players, they only look for easy kills) style as usual. That style will make good AP most of the time, though a true AP farmer is easily capable of making much more.
HISTORY & FOND MEMORIES
Two of the easiest ways I used to make AP (that tended to drive other people crazy as they couldn’t figure it out) were:
- Run two people, one a tank (I know I’ve said that there are no tanks in PvP) and the other a magicka nightblade with a fire staff or another knock back (such as Javelin). The tank would lure people to the edge of cliffs (you can find a LOT of them in Cyrodiil), and the nightblade would knock them off with a flame reach. The important thing to note there is that the two players would not be grouped, and the tank would not do any damage to the opponents, so the NB would get all of the AP. This works just as well with other classes, though takes better timing and positioning as a nightblade is able to stealth easily while multiple opponents charge at the tank (who would stand there and block at the edge of the cliff). The best such AP farming moment I ever had was 28 different players who all ran sporadically in to a particular location just north of Bleakers, most of whom died by being knocked off a narrow ledge with a meteor, and the rest with flame reach. That was about 50k AP in 2 minutes. Today, with the way ticks work, this style is no longer (as) effective.
- As a magicka NB who could stealth everywhere, find your way to wherever the two opposing factions are fighting. Once you’re there, throw out as much AoE damage as you can without actually getting into the fighting. Caltrops used to work well, though don’t do enough damage to get you the AP that you want these days. Inevitable Detonation was the go-to skill. As an AD player, casting it on an EP player would damage all EP players and all DC players in the area with enough to get a nice amount of AP regardless of who won the fights. Surviving can be challenging, so keep in mind movement speed as you’ll want to get away from the zergs as soon as they start to take more notice of you. This technique was what once got me the title “Grand God of AP Whores“.
TESTING METHODS
In order to understand a lot of the ways AP works, a person has to spend many hours testing every skill. Over time and different patches, AP gains have changed based on damage, healing, synergies, buff application, debuff removal, and debuff application. The results of the below have changed over time, and I will not share past and current test results – though this has always been a very important series of tests at each major patch that relates to the creation of new strategies on how I’ve made a lot of AP when solo/duo. Here are a few tests that you could perform to see how each skill that you have available impact AP gains. In the past (when I really cared about AP farming) I maintained spreadsheets for each skill in every tree available to any character on which I’ve wanted to make AP:
- Do damage to a target that someone else of your alliance kills. What percentage of the the damage needed to kill them did you do, and what percentage of the AP did you get? If shields were applied to the target, does the total damage to kill them include shield damage?
- Do damage to a target that someone of another alliance kills (If you’re AD, damage an EP player that a DC player then kills). What percentage of the the damage needed to kill them did you do, and what percentage of the AP from their death did you get? If shields were applied to the target, does the total damage to kill them include shield damage?
- Cast or use a skill that enables a synergy that someone else of your alliance uses before they kill a target. Does using the synergy equate to a percentage of the the damage needed to kill the target, or of healing on the friendly player, and what percentage of the AP did you get? Does the synergy damage count towards your or the other player’s contribution?
- Apply a debuff to a target that someone else of your alliance kills. Does the debuff equate to a percentage of the the damage needed to kill them, and how much of the total AP from their death did you get?
- Apply a debuff to a target that someone of another alliance kills (If you’re AD, apply a debuff to an EP player that a DC player then kills). Does the debuff equate to a percentage of the the damage needed to kill them, and what percentage of the total AP from their death did you get?
- Heal someone else of your alliance who then kills a target. What percentage of the damage that they took did you heal or what percentage of their total health did you heal (two separate tests) and how much of the total AP did you get? If you shielded instead of healed, how does that affect the numbers?
- Apply a buff to someone else of your alliance who then kills a target. Does the buff equate to a percentage of the healing done, and what percentage of their AP did you get?
- Remove a debuff from someone else of your alliance who then kills a target. Does the debuff removal equate to a percentage of the healing done, and what percentage of their AP did you get?
For each of the above, you should also consider (and test) for the beneficial activities (healing, shielding, synergies, buffing, or removing a debuff from a non-grouped same-faction player), how long after you apply them will the link from you to the other player last. It may be solely for the kill in question, it may be for a period of time (perhaps until they exit combat), or it may be for a particular range (from one end of the bridge to the other).
There are some skills, abilities, synergies, buffs, and debuff removals that can apply to people who are not in your group, and when they are performed, you gain a percentage of the credit for the player on whom you cast, or you may be treated (for the purposes of AP gains) as an equal member of that player’s group (even if that player is part of a full 24 player group). If that latter, then a new series of tests need to be performed per the paragraph above related to how long will the link from you to the other group last. Another very important consideration for situations where multiple conditions apply, and you gain links to multiple groups who both participate in a kill – in that case, it may be possible that you can double-dip in the AP gains and be considered as a full member of multiple groups gaining AP for both netting you more AP than you would normally get for your own contribution. This situation is most likely a bug, and you should report it if you find one that is working.
One last consideration (that I’m sharing) is related to guards. Are there skills or abilities that you can use that affect guards at a keep or a resource? If you use the right ones, and guards do damage to opposing players, might that damage be considered as coming from you for the purposes of AP calculations? Since I’m bringing this up, it’s obvious that this does work. I’ll leave it to you to figure out how to make it work!
TIPS & TRICKS
There are a few relatively simple things that people don’t often realize, so in this section I’m going to list a few of them. None of these are game breaking or particularly amazing, though if you combine them all, think logically (and slightly out of the box), and consider many of the things I’ve written about earlier, then you’ll come up with a lot more that can help you earn more AP.
- Your own death and the death of your allies counts for AP towards a tick. If you’re fighting at a keep where you expect a defence tick, it is in your and your allies’ interest to die every five minutes (the time for your AP to be worth max) in order to increase the size of the tick that will happen once the fight is over. Always ensure that you’ll be able to resurrect before dying!
- Related to the above, if you know that an opponent is going to bomb a flag just before it flips (for your offence tick), let it happen. The deaths of your allies will increase the size of the tick. If you play a healer, it may be counter to your nature to let people die, but AP > life!
- A resource can only give you an offence tick every five minutes. Keep this number in mind, as small groups who want to farm a resource won’t expect defence ticks and will usually allow it to be flipped back to your faction’s control (so that they can flip it again five minutes later). This gives you a window of control where a defence tick may be possible, whereby you’ll get the AP benefits of their kills.
- If you’re roaming around looking for small groups who want to take resources, once you engage in a fight, try to pull them back into keep range rather than resource range. Remember that resources don’t multiply defence ticks (as of 2021/06) and keeps can multiply them by up to 3. Resources used to multiply up to 3 and keeps up to 7. Those were good times!
- If it looks like you probably won’t kill your opponent quickly, and you’re in range of a keep with a multiplier, then it might be in your interest to just let your opponent kill you (netting them 1.5k+) so that you can get the defence tick from your own death of 4.5k+ (note that this is the base number, and it will almost certainly be higher per this spreadsheet.
- Consider when the end of a fight should be for you, rather than for everyone else. If a group of opponents have all died, you’ve earned AP, and they then all take a camp to resurrect, they are not going to be worth much AP for a few minutes. It is probably in your interest to go find other opponents to kill!
- If you come across a small group who are in stamina/tank builds who are trying to farm a resource, don’t even bother. Move on to fights where you’ll make more AP. These players specialize in survival, rolling around and running with a lot of cross healing to stay alive until they can coordinate their damage.
- If you come across an allied zerg chasing after a few players (such as the example above where 20+ players chase them into a tower), don’t waste your time. You’ll make more AP moving on to a fight where your contribution will make a difference rather than getting one skill off on a target before they are zerged down or run away.
- You can earn ticks for a keep and its resources at the same time as long as you don’t earn AP at another keep or its resources. If you’ve finished a fight and move on, ensure that the kills you make or contribute to are not at anther keep or resource until you get your defence tick from the prior one.
- Use an addon to be certain of your location. I prefer Wykkyd Toolbar. Here’s an example, and note that the location is listed on the left (ish) side. You can configure the toolbar to show a lot of information!

- Keep moving, and check your back keeps’ resources. There will often be players coming to flip them, and those make the best AP gains (if you’re solo or in a small group).
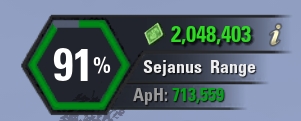
- Keep track of your AP. Set a goal of how much AP per hour you want to make. Use Ghostbane’s AP Meter, and be sure to configure it in your addon settings (I don’t like having my chat area spammed with AP notifications from combat – only ticks). Here’s what the addon looks like:
If anyone would like to discuss AP farming techniques (or anything relevant), I’m happy to do so in Discord.