This site is my attempt to ensure that as many people as possible are educated on the basics of ESO PvP.
Information & Guides
My name is Nait, and I play the character Crown (@crown77) in the Elder Scrolls Online. I’ve been leading groups and writing PvP guides since the start of the game. This site is meant to help new players learn how to PvP in Cyrodiil. The information here is relatively generic, and shouldn’t change much from patch to patch. If you have any questions, please join us on Discord, and/or you’re welcome to join the Just Chill guild in game.
Basics
If you're new to PvP or need info on the basics, start here
Healing
Info and guides on how to be a great healer, solo or in groups
Groups
Playing in & fighting against PuGs and ball groups
Mayhem
Succeeding during the Mayhem Cyrodiil events
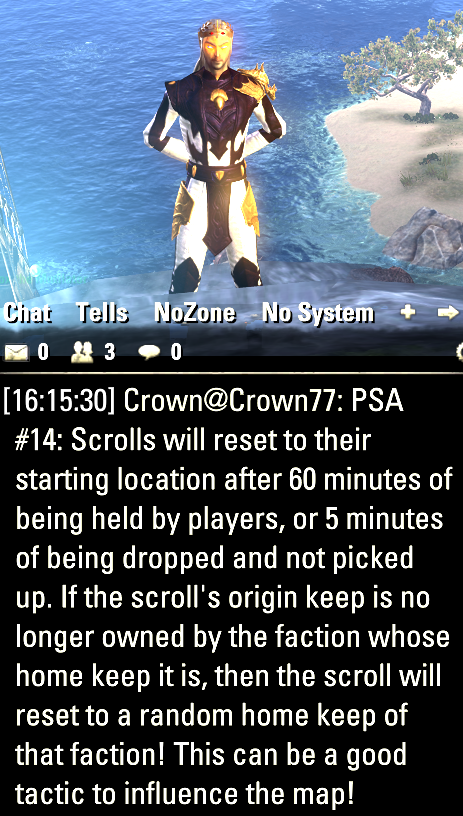
Scrolls
Running scrolls & how to best support runners
Making AP
Making Alliance Points
Emperor
Achieving Emperor in Cyrodiil
PSAs
Copy-pastable public service announcements for zone chat